Showing posts with label recipes. Show all posts

January 27, 2015

Week 3 The Seasonal Kitchen: 12 weeks to seasonal living


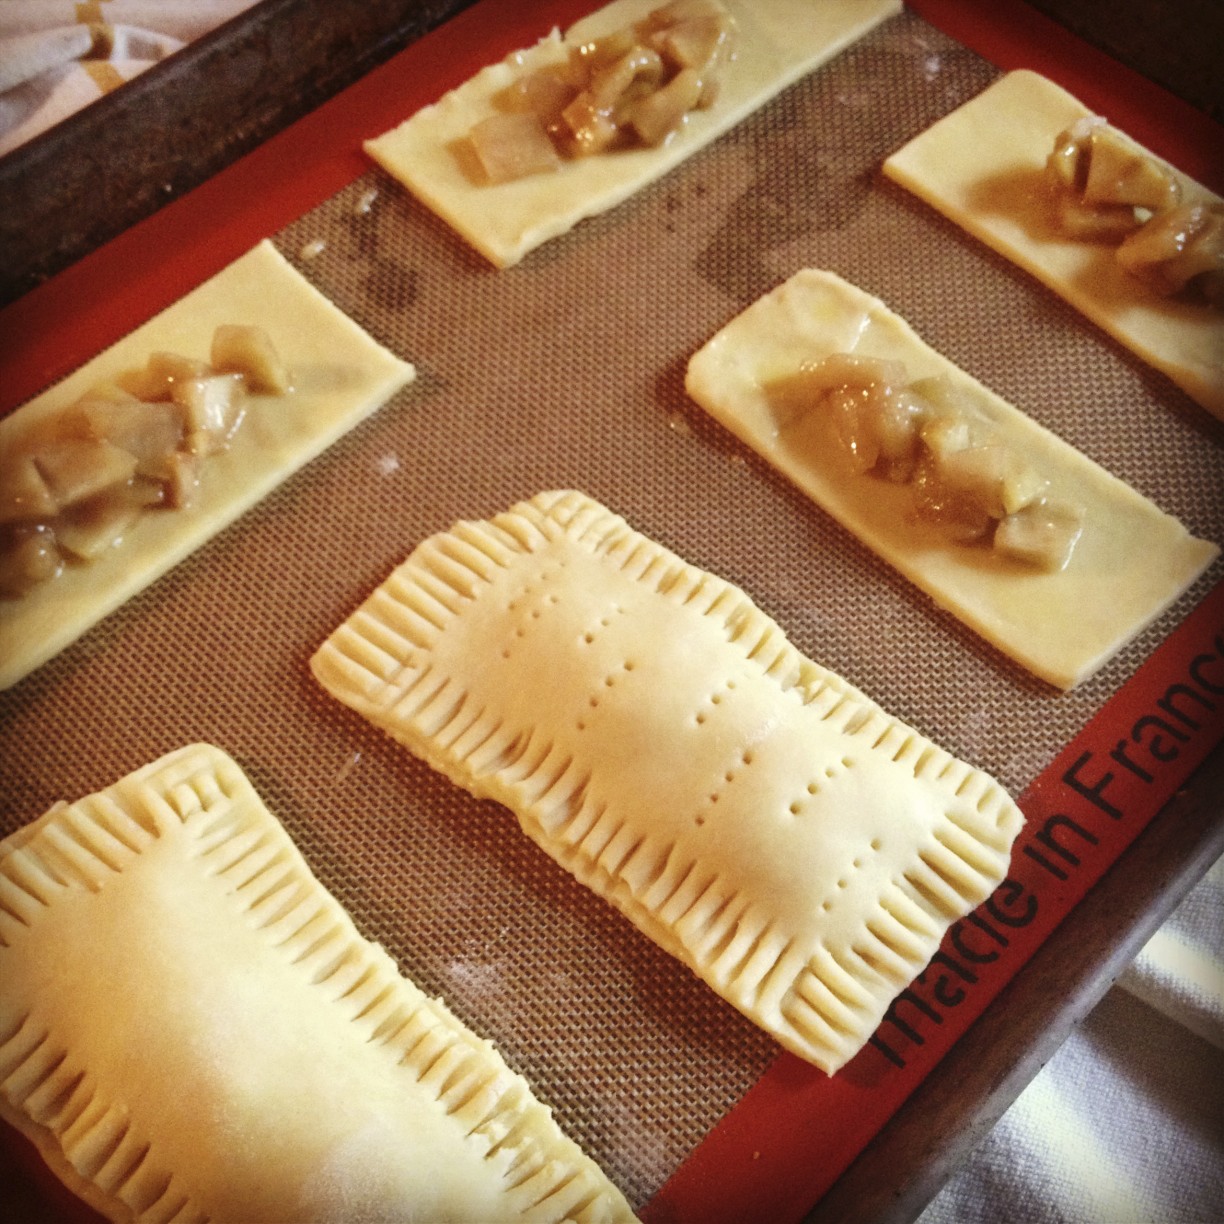
Week 3 of the HomeSpun Seasonal Living Workbook is all about the magic we make in the kitchen, and raises awareness for incorporating seasonal ingredients into our meals each week.  

Seasonal foods are local foods harvested in season. There are different definitions used to define the term “local,” and even the “seasonality” of foods can vary depending on where you live and how far from your home you are willing to source your food. 

Within 100 miles? Within the State? Within the Region?

This week I revisited my own definition of locally sourced. I generally consider regional sourcing to be sufficient, where the bulk of our meat, vegetables, and fruit come from in and around the greater Richmond area, as well as anything else produced within the state, and sometimes including neighboring states like DC, MD, and North Carolina. 

So what is in season in Virginia this time of year? After sifting through a range of different sources I found these state specific seasonal produce guides to be the most helpful. I was surprised by the variety considering Virginia has a pretty dormant Winter growing season. 

I reorganized the list by month so I could print out and easily reference what is in season when meal planning and shopping each week. 


Lately we've been shopping at Whole Foods, RelayFoods.com, and Elwood Thompson's, which specialize in doing the admittedly harder work of sourcing and labeling local seasonal foods for us. I based my shopping list last week off of the seasonal food list above, which simplified my options and streamlined my shopping experience.

I made a hearty vichyssoise soup of leeks, onions, and potatoes; roasted and caramelized sweet potatoes; spinach salad with boiled eggs, apples, and chicken; roasted butternut squash and mushrooms with pork tenderloin; another smokey potato soup with carrots and fennel; and roasted beets with olive oil and sea salt. Plus whole grains, pastured meats, pears, and lots of citrus—cara cara oranges, satsumas, grapefruit, meyer lemons and limes. 

(Oh wait, citrus isn't local to Virginia? I'll get back to that in a minute!)

Our food was simple, and delicious, and vegetable centric. It truly felt like Winter in my kitchen.

So what about citrus fruits that are technically at peak sweetness in Winter, and in season with the nation-wide harvest, but definitely not local to Virginia? I don't know. Right now we are devouring them. And what about eggs and chicken, and bacon? When we shopped at the Farmers Market almost exclusively we could not get eggs in the winter, or bacon whenever we wanted it, even chicken year round. There is a season for animals too and it has been largely lost or bypassed through technology and factory farming. These complicated issues make the challenges of eating seasonal fruits and vegetables seem easy in comparison.

A few good resources for sourcing and cooking seasonal foods:

At localharvest.org you can look up local CSA’s, farmer’s markets, and farms by zip code. 
Find local farms at PickYourOwn.org.

How did last week go, did journaling help connect you to the season? Share some of your captures of winter. I would love to go there with you.

April 16, 2014

My First Fermented Tea: Kombucha


A few weeks ago a friend came to visit and she brought with her a gift for me in the form of a baby SCOBY (or Symbiotic Colony of Bacteria and Yeast). They are pretty hearty and I kept mine in the cupboard for a week while I waited for a good brewing vessel to arrive.

Our local grocer carries kombucha on tap and I've been more than a little curious about the recent homebrewing craze. This is my first go at making my own kombucha and so far I like how unfussy and forgiving the process is. At least it seems that way!

SCOBYs thrive in a nutrient mixture of tea, water, and sugar. To create the nutrient I boiled 2 liters of spring water, and steeped 8 bags of black tea for 30 minutes. Then I added 1 cup of sugar and another 2 liters of water and let the nutrient reach room temperature overnight before adding my SCOBY.**

After securing the jar opening with a rubber band over a square of cotton fabric to keep out any little bits of dust or curious bugs, I left it to sit out on the counter for another week or so. (I like that precision is not key to the brewing process.) When I taste-tested the kombucha, it seemed about right—a little tangy but still pretty sweet, with a teeny tiny hint of that effervescence that I love so much.

I could have consumed it then, but I like kombucha best when it is really bubbly so I bottled it up for a second fermentation to give the carbon dioxide a chance to build up for good carbonation. I left this batch flavored plain but next time I think I will try for an easy addition like grated ginger or vanilla extract.

**A few little particulars: High heat will kill the SCOBY (so don't put your baby SCOBY into a hot tea bath) and SCOBYs don't like metal (so no metal spoons or containers can touch the SCOBY or the brew, if the SCOBY is still in it).

Update: On day 2 of the second fermentation, the kombucha tasted great but there wasn't enough fizz. On day four the flavor was pretty sour but the fizz was good. I will try again but this first batch will be repurposed as fruit spray or used for other household cleaning needs.

February 1, 2014

Valentine Shortbread Cookies: Three Ways

I wrote this post for RichmondMom. You can read the full post here


Whether you’re scouting for a sweet treat to gift your valentine or a fun baking activity to celebrate with your littles, these shortbread cookies are just the thing.

Made with only a handful of pantry staples that you probably already have on hand, I love the versatility of this rich buttery dough and the ease with which you can transform it into an offering of affection in practically no time.

Mix up a batch (or two!) of basic shortbread and then consider what will tickle your fancy: rolled cookies, linzer cookies, or mini thumbprints.

A few perfectly imperfect sugar treats from the heart are sure to capture the attention of your darling valentines.

Basic Shortbread Dough: 
  • 3 sticks butter, softened 
  • 1 cup sugar 
  • 1 teaspoon vanilla extract 
  • 3 1/2 cups flour 
  • ¼ teaspoon kosher salt 
In the bowl of an electric mixer cream together the butter, sugar, and vanilla until it is well combined. Add the flour and salt, and mix on low speed until it begins to come together. Then dump it onto a floured surface and gather up all the crumbs into a ball.

*A quick tip on knowing when the cookies are done: Look for the dough to puff up, but not brown. I prefer a buttery and crumbly texture, so I pull them out when the cookie begins to golden up where it meets the pan. If you like a crunchier cookie leave them in for a minute or two longer than specified. If you cut out cookie shapes of different sizes, baking time will vary so keep an eye on the little guys and pull them out when they look ready—be careful when transferring cookies straight from the rack, the shapes are easy to distort when they are hot.

(Read more ...)

November 2, 2013

Pumpkin Spice Cake with Vanilla Bean Cream Cheese Icing: recipe reveal


I've blogged this Pumpkin cake before, and referenced it in many posts over the years.

It is so incredibly good and by now I've made it my own, so are you ready to hear what's in it?


Pumpkin.  

Cozy.

dFreshly grated nutmeg.

Christmas.

Vanilla bean paste.

Heaping teaspoonfuls of cinnamon, clove, and allspice.

Joy.

Oh, and some butter. 


The cake is dense, spicy, and moist. It's full of flavor and not too sweet.


A fluffy vanilla bean cream cheese icing raises the charm and sophistication of this otherwise humble little spice cake.


Pumpkin Spice Cake with Cream Cheese Icing
1 cup unsalted butter at room temperature
3 1/4 cups cane sugar

3 eggs
1 teaspoon vanilla bean paste (or extract)

1 heaping teaspoon ground cinnamon
1 heaping teaspoon clove
1 heaping teaspoon allspice
1/2 freshly grated nutmeg pod (or 1 teaspoon ground, heaping of course)
1/4 teaspoon sea salt (or kosher)
~2 cups pure pumpkin, canned or fresh (~15oz.)
2 1/2 cups all purpose flour
1 teaspoon baking soda
  1. Pre-heat oven to 350 degrees.
  2. Grease and flour a bundt pan.
  3. In a stand mixer cream butter and sugar; mix on medium until it starts to form a crumbly mix, then turn up the speed to high for 2 minutes until light and fluffy. Scrape the sides of the mixing bowl.
  4. One at a time, beat in each of three eggs. Scrape the sides of the mixing bowl. 
  5. Add vanilla bean paste, nutmeg, cinnamon, clove, allspice, sea salt, and pumpkin. You can't add too much spice! Mix on medium speed until everything is well combined. 
  6. Add flour all at once, with the baking soda, and stir on the lowest setting until it begins to form a batter, then increase the speed to high for 5 or 6 seconds. The batter should be well combined, but take care not to over-stir!
  7. Pour into prepared bundt pan.
Bake at 350 for 55 minutes, plus or minus 5 minutes. Check for doneness at 50 minutes and keep a close eye. If a knife inserted into the middle comes out with a few crumbs on it, then it's just right.

Let the cake sit for a half hour, and then do your best to plop it out of the pan. If part of the top breaks off you can just nestle the pieces back into their spot and frost over it.

While you wait for the cake to cool turn your attention to the icing.

Cream Cheese Icing
16 ounces cream cheese, 2 packages, room temperature
1 cup unsalted butter, room temperature
32 ounces powdered sugar, 2 boxes
Two tablespoons vanilla bean paste (or extract if you don't want vanilla seeds in your icing)
  1. A half-recipe will cover an entire bundt cake with a nice layer of icing, but the amount specified here will give you plenty to pile high on the cake, and enjoy by the spoonful too. 
  2. Using a whisk attachment beat cream cheese, butter, and vanilla bean paste on medium until they start to come together, then mix on high speed until well combined. Scrape the sides of the mixing bowl.
  3. Add powdered sugar on a low speed to avoid a powdery sugar cloud in your kitchen. Once it begins to combine you can whip it on high for a few minutes until the icing is smooth and airy.
Allow cake to cool completely before icing it, at least a couple hours. To get the hand-frosted look use a butter knife or frosting spatula to spread the icing over the cake to provide full, even coverage. Just move the icing around until you think it looks pretty.

I think the cake tastes best after I let it sit for 12-24 hours before cutting into it. This gives the icing a chance to hang with the cake, soak into it a little bit, and develop an eggshell thin crust, which offers a nice texture.

Enjoy!

October 25, 2013

Thursday's Apple Crisp


We visited the apple orchard earlier this week, and so were set on making a crisp. This is Thursday's variation of my go-to recipe for this dessert, my favorite because it bakes up something amazing, and lends itself to endless variation from the fruit to the nuts to the spices. 

We let ours sit for 15 minutes to cool and set up a bit, then we dished it up and poured cream over the top. Of course, you can't go wrong with a vanilla bean whipped cream or ice cream.

This recipe could really be taken to the next level with the addition of a bottom crust. That's for next time: apple pie with crumb topping. Oh yes. Thanksgiving feels right around the corner. 

Thursday's Apple Crisp

Apples
Peel and slice your favorite variety or mix of 12 medium apples (about 4 lbs)
Sprinkle 1/4 cup cane sugar over the apples (add more or less to taste)
Grate fresh nutmeg to taste (I used 1/2 a nut)
Squeeze the juice of 1/2 a lemon and toss the mixture lightly to coat

Topping
Mix together in a food processor or stand mixer until crumbly:
1 1/4 cups flour
6 tablespoons brown sugar
1 1/2 tablespoons cane sugar
1/4 teaspoon ground cinnamon
2/3 cup walnuts, shelled
12 tablespoons unsalted butter

pinch of sea salt

Dump and distribute the topping evenly over the apples. (I get distracted while cooking and the crumble often processes until it forms a dough, if that happens to you just pinch off little bits and assemble them on top to cover the apples.)

Bake at 350 degrees for about 40 minutes or until the juices are bubbly and the topping begins to brown. 

October 21, 2013

Fall comforts: a morning snapshot and the best hot cocoa


Like most mornings this time of year, we wake before the sun. Merritt, snuggled into the contours of my side, pushes off me with his feet and frees himself from the coverlet, shimmying up to sit on our shared pillow. 

“I'm ready to get up!” 

Andy is out of town this week, so there is little choice. I step bare feet to the chilled wood floors, lean over the bed to gather him up in my arms, and remind him that Brother is still sleeping nearby. In a hurry I shuffle around the bed and out into the hallway, to minimize Merritt’s opportunity to wake the entire house.

We have lived here for less than a week and I haven’t yet learned our space by heart. I shield Merritt’s eyes to flip on a light.  

He lets go and scampers off to find his place on the living room couch.
 
I head into the kitchen to tidy up, lifting the trash out of its can and depositing the bag on the side patio. The morning sky is brightening; a blue hue blankets our yard. Our family of recently picked pumpkins cascades down the stoop, and a feisty breeze from somewhere cooler enters my pant leg at the ankle.

The long awaited Season is finally here, Fall weather and all.

Merritt has found a book to look through. I glance in the cupboard to make a decision about breakfast. A bottle of vanilla bean paste, a bag of semisweet and milk chocolate chips are arranged neatly in waiting. I remember my intention to make hot cocoa this week. It is Monday, which means chocolate for breakfast makes so much sense.

Within minutes the mixer is whirring at high speed. Sugar, cream, and vanilla, are whipped into a dreamy shape.

Roscoe appears at the door jamb, curls disheveled. He’s curious what Momma is up to.

I melt the chips, warm the milk and cream, and combine it together to present drinking chocolate that we top high with sweet cream, flecked with vanilla bean.

I pour three small cups and pass them out to eager hands. We sit together in our sleepy state, sipping Fall in the half-dark.

________________________________________
Recipe adapted from an adaptation:

3.5 oz. bittersweet chocolate, coarsely chopped
3.5 oz. milk chocolate, coarsely chopped
1/2 cup boiling water
3/4 cup whole milk
1/4 cup heavy cream

In a medium bowl, combine the bittersweet chocolate with the milk chocolate. Add the boiling water and let it stand for 1 minute. Whisk the chocolate mixture until it is smooth.

In a small saucepan, bring the milk and heavy cream just to a simmer. Add the chocolate mixture and whisk over moderate heat until hot. Pour into small mugs and garnish as you like!

June 28, 2013

The Homemade Pantry, and other adventures

It's glorious summertime and I have been living in the sunshine with the boys and soaking up all the good stuff offered by our little city on the river.  Our life here continues to be exciting and full, and my list of to-dos appears to be growing wildly by the day.

Despite the crazy, I've been finding little bits of time to cook throughout the day, especially in the early mornings when the boys are feeling mellow and happy to play together outside or in. It seems that a half hour or less is all it takes to create something we can share together later for lunch or dinner.

I started a cook-through* project last month, which means that I have been cooking and baking my way through the Homemade Pantry: 101 foods you can stop buying and start making. It's authored by Alana Chernila who writes at Eating From the Ground Up.


On my quest to create some adventure in the kitchen while also bringing wholesome foods to the bellies of my family, I was pleased to find a volume of accessible, easy to execute (I will go so far as to say fail-proof) recipes that offer the opportunity to build and hone culinary skill no matter whether you consider yourself a novice or a pro. I've learned an incredible amount so far and it has been exciting to branch out and finally know how to create things like creme fraiche, and ricotta cheese.

The recipes are so very relevant to family life, and written with attention paid to the way that food is prepared, served, and stored in real households with picky eaters and tired mamas. Each recipe includes a lovely in-context story piece and helpful hints that offer advice on fridge and freezer storage. The ingredient lists are simple and healthful, and the photos pretty and bright.

If we follow each other on Instagram then you probably are quite aware of what has been going down in my kitchen recently (if not, I'd love to connect--you can find me @marblesrolling), for everyone else let me share a little taste:

Instant Oatmeal

Jello

Maple popcorn

Ricotta cheese

Mayonnaise

Pickles

Chicken Nuggets

Apple turnovers

Cornbread (smiley face)

Granola Bars

Potato leak soup

Lemonade

Ginger Applesauce

Buttermilk ranch dressing

Raspberry jam

Honey almond oat granola bars

Flour tortillas

Strawberry ice cream

Hummus

Cranberry orange cereal bars

Pizza!

Strawberry fruit leather

Mac & Cheese casserole

Hamburger buns

Yellow mustard

Brown Sugar

Pancake ready mix
Bulk recipes for instant oatmeal, and pancake ready mix have become staples out of pure convenience. Instead of buying snacks and packaged products (loved by all three of the boys who live in this house) it has served us so much better to treat ourselves to batches of granola bars, popcorn, fruit leathers, and other goodies that can be packed in lunches and easily transported to summer camp or to the office.

On the point of cost I have wondered if making even the most basic foods from scratch really saves money each week, and for us I don't think so, but I certainly enjoy my time in the kitchen more and we also enjoy a much greater variety of foods that are without processing, chemical additives, and preservatives to boot.

Which book would you pick for a cook-through?

*You may remember the other cook-through project that I began years ago and quickly abandoned

March 13, 2013

Vanilla Milk for the Kiddos

Every week I spend some hours sitting at the Starbucks down the street to catch up on my email, read articles, and prep lesson plans for class. I often take care of online errands for the family, researching preschools or making doctor appointments. At some point I buy a drink as an offer of patronage, usually a short chai latte with whole milk, extra foam. Sometimes I add a shot of espresso if I need to perk up. It's a pricey little ritual.

The other day when I was digging out the popcorn popper from the highest shelf behind the fridge, I came across my milk steamer and remembered that I could make a frothy little chai for myself at home.

Not to be left out, the boys wanted their own "coffee." So we revived our recipe for vanilla milk. It has become their comfort food, a calming treat that they look forward to in the early mornings or just before bedtime. The kids have made a happy routine of drinking it from their mini mugs.

The recipe is too simple:

Vanilla Milk


1 cup whole milk
2 tsp. brown sugar
1/8 tsp. vanilla extract

The steamer is great for this but a microwave or pot on the stove works just fine, you only need to gently warm the milk. If you are using a microwave, one minute turns a cup of cold milk lukewarm, which is perfect for this age. Let the kids spoon in the sugar and vanilla and stir it up, then you can pour it into their cups.


July 11, 2012

Berry CSA: weeks 10 &11


In week 10 we received blackberries, blueberries, raspberries, and plums. The plums reminded me of the variety that we could find in California growing on trees in our neighborhood, small and soft and so sweet.  

In week 11 we got
 blackberries, blueberries, raspberries, and doughnut peaches, which turned out to be one of my favorite fruits this year. Our CSA hit 100 days of strawberries this season which is impressive, and so we also got an extra carton of strawberries. You may guess as to how I felt about that!

For the most part we ate our fruit as it came to us, but I did bake a
Three Berry Buttermilk Bundt Cake for 4th of July (phenomenal!), and a recipe for Blueberry Chocolate Banana Bread. Both have been added to my bank of go-to recipes for their simplicity and because they were really, really, good. Not to mention how gorgeous the final loafs were, your Summer houseguests will be impressed!

For the bundt cake I substituted oranges in place of the lemons. For the banana bread I omitted the bourbon (only because we didn't have any!) and substituted blueberries for the walnuts. 

June 25, 2012

Berry CSA: weeks 7, 8, & 9

I'm really behind in posting about our berry CSA.  I love, love, love community supported agriculture, but at some point in every season, I think to myself, "Oh no. Not more . . . ."  The week before last it was strawberries.  During the fifth week of our veggie CSA it was snow peas and cucumbers.


The fruit is always gorgeous, fragrant, and so pretty to look at. It really should be consumed within the first few days after we pick it up at the market or it starts to look drab and necessitates being baked into something.  I have no excuse for letting some of their perfect berries go to waste.  I know. I feel terrible.  I just couldn't think of anything more to do with those strawberries, and I'm the big fruit eater around here and I was sick for a couple of these weeks with zero appetite.

Here's what we've been eating and (in some cases) tossing:

Week 7: strawberries, blueberries, raspberries
Week 8: blackberries, raspberries, strawberries, blueberries
Week 9: blackberries, blueberries, raspberries, apricots

Our recipes over the last few weeks have been uber simple: berry salads with honey glazes, or yogurt toppings; berries over ice cream; berries in oatmeal; berries with whipped cream.

I bake a fancy cheesecake in the winter months that has a delicate sour cream layer on top and I always make sure to whip up a little extra topping so that I have plenty to "taste test" without impacting the final product.  All of that to say that I made a batch of the sour cream topping and used it as a dip for the berries, and it was really good.

I'm not terribly precise when I do this, but I mix in a small bowl approximately 3/4 cup sour cream, 2 teaspoons of vanilla, and 1 tablespoon of sugar (you can use brown or white).  You can add more or less sugar and vanilla depending on your taste.  It pairs well with strawberries and blueberries in particular.

Speaking of blueberries, we've been eating a lot of blueberry pancakes. A lot. We enjoy a good breakfast-for-dinner at least once a week.

The very best pancake recipe that I have ever made, and that we've been making for several years comes from the Joy of Cooking...it's true!  Actually, I first saw the recipe when I watched the McNeely's on the Food Network one evening back in 2010.  We've been making them ever since, but recently I was looking through my joy of cooking cookbook and the recipe is EXACTLY the same, except the McNeely's add pecans.

They are so perfect.  Fluffy, tender, and a little on the sweet side.


The recipe for the "Best Buttermilk Pancakes Ever" (or depending on who you ask, "basic buttermilk pancakes", or "buttermilk pecan pancakes"):

DRY ingredients:
1 1/2 cups all-purpose flour
3 tablespoons sugar
1 1/2 teaspoons baking powder
1/2 teaspoon baking soda
1/2 teaspoon salt

WET ingredients:
1 1/2 cups buttermilk
3 tablespoons unsalted butter melted
2 large eggs
1/2 teaspoon vanilla

Whisk dry ingredients together in a large bowl.
Whisk wet ingredients together in a large bowl.
Pour the wet ingredients over the dry ingredients and gently whisk them together, mixing just until they are combined.

Place blueberries on each pancake after the batter has been poured.
Related Posts with Thumbnails